Tutorial kali ini adalah untuk membuat 'partition' HDD anda menggunakan sistem operasi Windows 7. Ada 2 langkah yang boleh anda lakukan. sila lihat tutorial di bawah :-
OPTION ONE
Using Disk Management
1. You will first need to shrink a partition or volume from the free space on a disk to create unallocated space on that disk to use to create the new partition or volume with on the same disk.
2. Open the Control Panel (All Items view), and click on the Administrative Tools icon. then close the Control Panel window.
3. Click on Computer Management in Administrative Tools, then close the Administrative Tools window.
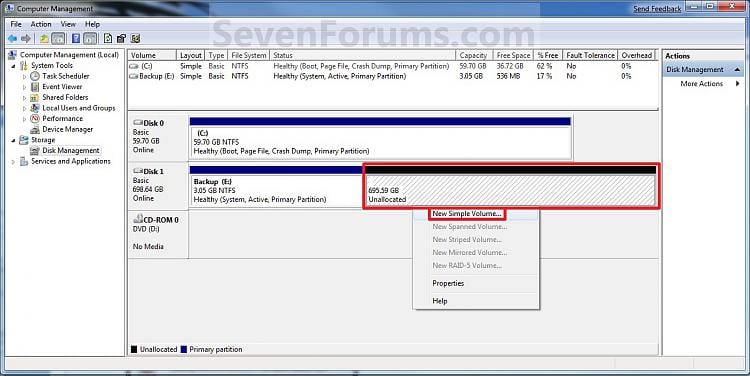
4. In the left pane under Storage, click on Disk Management. (See screenshot below)5. In the middle pane, right click on the empty unallocated partition or volume and click on New Simple Volume. (See screenshot above)
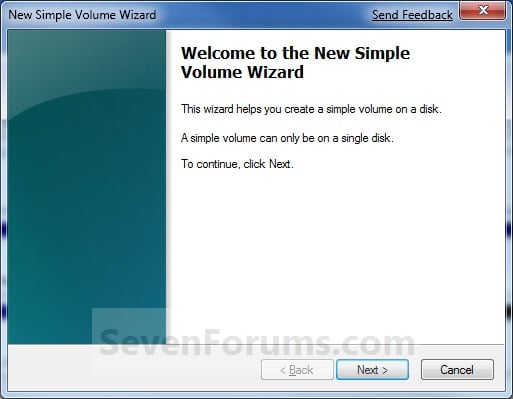
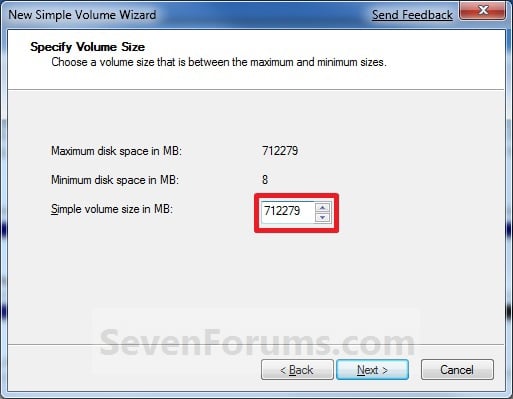
6. Click on the Next button. (See screenshot below)7. Type in how many MB (1 GB = 1024 MB) you want to use from the unallocated partition to create the new partition with, then click on the Next button. (See screenshot below)
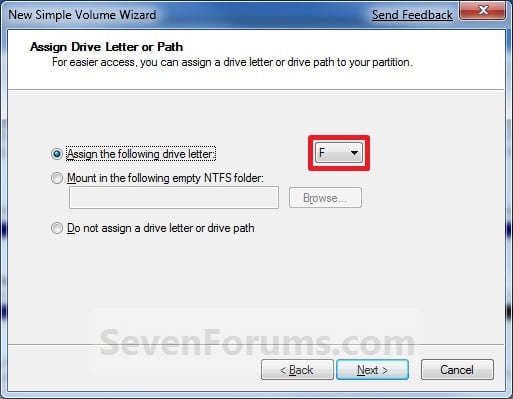
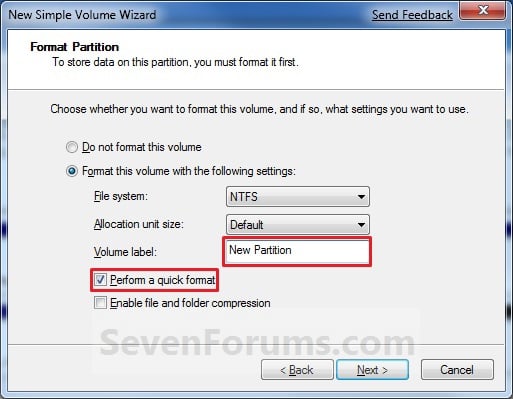
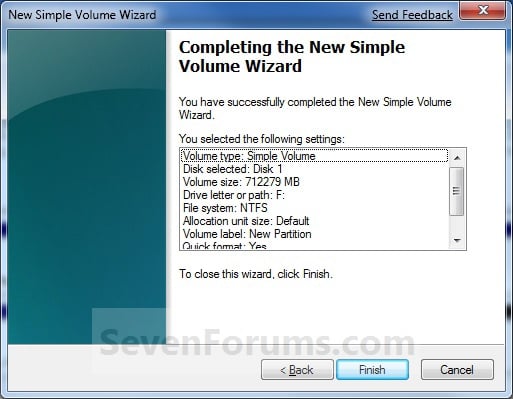
NOTE: If you want to use all of the unallocated partition to create the new partition with, then type all of the maximum disk space shown for the unallocated partition. If you do not use all of the maximum disk space, then you can use the left over space from the unallocted partition to create another new partition with.8. Select an available drive letter that you want to be assigned to the new partition in Computer, then click on the Next button. (See screenshot below)9. Type in a volume label name that you want for the new partition, check the Perform a quick format box, and click on the Next button. (See screenshot below)10. Click on the Finish button. (See screenshot below)11. The new primary partition or volume has now been created with the assigned unallocted partition space (step 7). (See screenshot below)12. Close the Computer Management window. (See screenshot above)
OPTION TWO
Using Diskpart in a Elevated Command Prompt
2. Open a elevated command prompt, or a command prompt at boot.
3. In the elevated command prompt, type diskpart and press Enter. (See screenshot below)
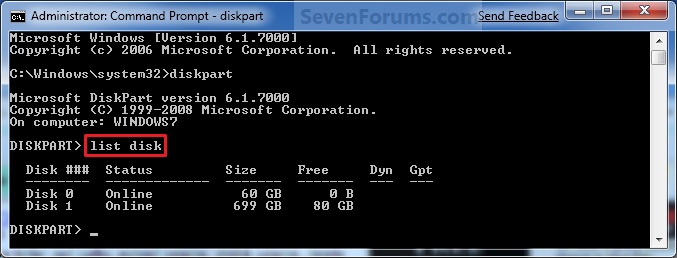
4. In the elevated command prompt, type list disk and press Enter. (See screenshot below)
NOTE: This is to help you ID the disk number that has Free unallocated space that you want to create a new partition with. For example, Disk 1 with 80 GB of free space.
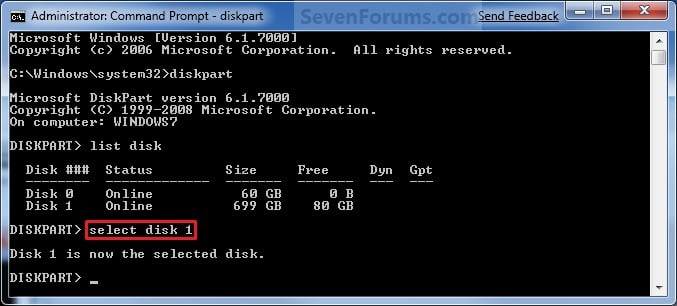
5. In the elevated command prompt, type select disk # and press Enter. (See screenshot below)
NOTE: You would substitute # for the disk number listed that you want to create a new partition with the free unallocated space there. For example, I want to create a new partition with the 80 GB of free space, so I would type select disk 2 and press Enter.
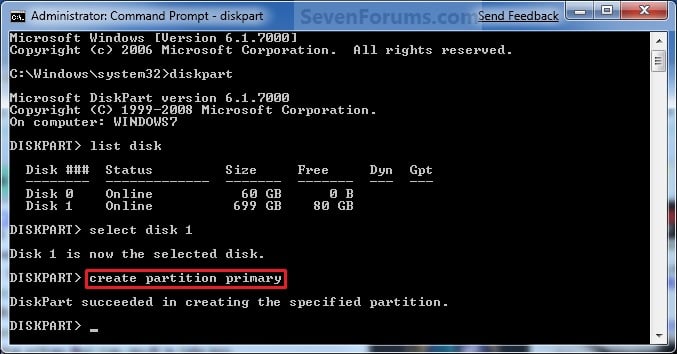
6. In the elevated command prompt, type create partition primary and press Enter. (See screenshot below)
NOTE: This will create a new blank RAW partition with selected disk (step 5) that contains the unallocated partition free space.
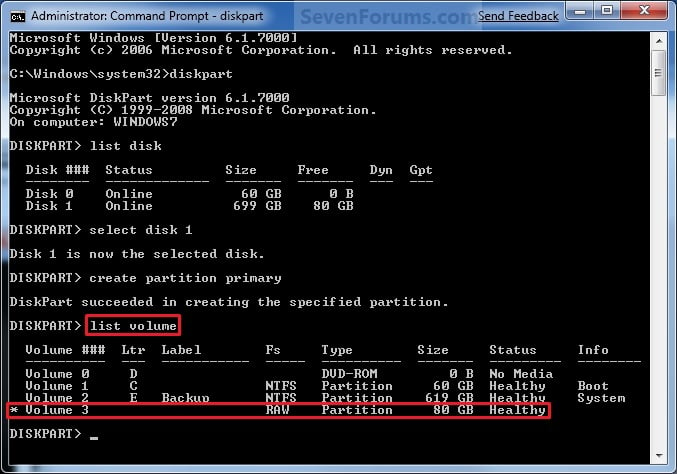
7. In the elevated command prompt, type list volume and press Enter. (See screenshot below)
NOTE: Look for the volume number that has the same Size as from the Free space in step 4. For example, Volume 3.
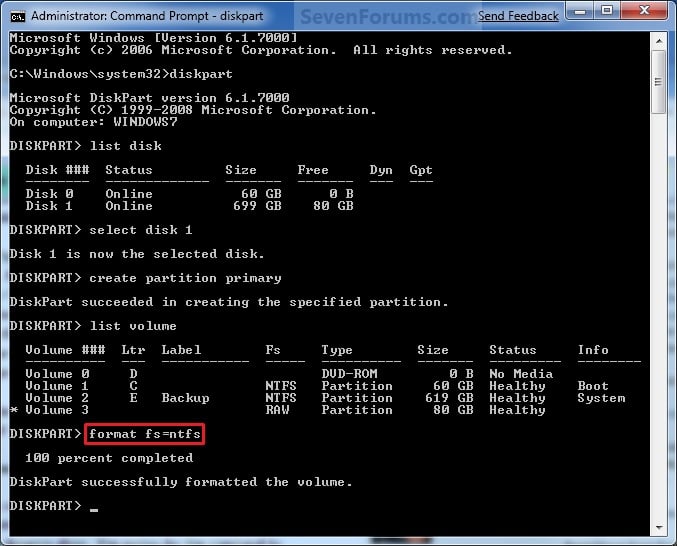
8. To Format the Partition or Disk as a NTFS File System -
NOTE: This would be good for using with Windows 7 or Vista for example.
A) In the elevated command prompt, type format fs=ntfs quick and press Enter. (See screenshot below)9. To Format the Partition or Disk as a FAT32 File System -
NOTE: Having quick added at the end of the command will do a quick format instead of a full format on the new blank RAW partition (step 6) to make it a new partition.B) Go to step 10.
NOTE: This would be good for using with a USB key drive for example.
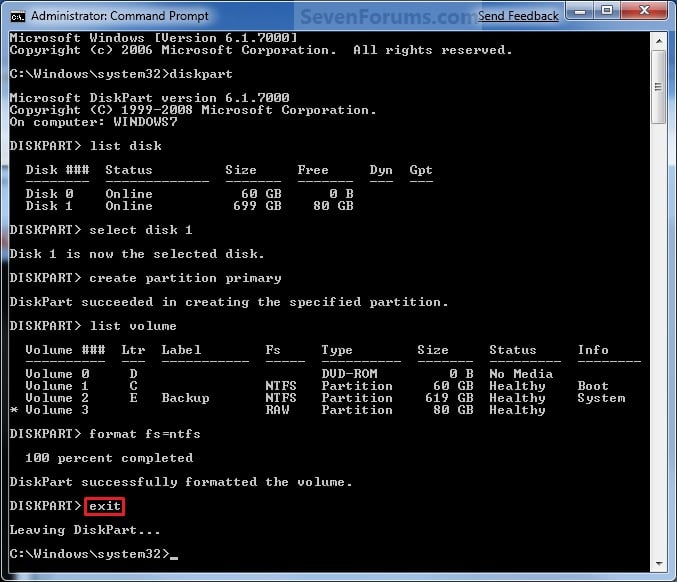
A) In the elevated command prompt, type format fs=fat32 quick and press Enter. (See screenshot below)10. When it is finished formatting, type exit in the elevated command prompt and press Enter. (See screenshot below)
NOTE: Having quick added at the end of the command will do a quick format instead of a full format on the new blank RAW partition (step 6) to make it a new partition.
11. Close the elevated command prompt.
12. The new primary partition has now been created. You can now see the new partition in Computer with a drive letter.
harap dapat membantu.
wsalam
sumber : www.sevenforum.com


No comments:
Post a Comment